


If you are looking for a decorative way to mend a rip or hole in a garment or bag, you have come to the right place! In this post, I will show you how I used Sashiko to create a beautifully embroidered appliqué patch, which also reinforces the damaged fabric.
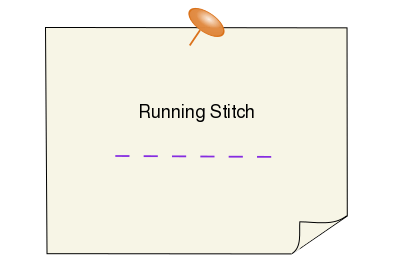
Sashiko is a type of Japanese embroidery stitching which was traditionally used to reinforce garments. It takes advantage of the simple Running Stitch to create decorative patterns while sewing an additional layer of fabric on top of the worn area of the garment.

As shown in the above image, my daughter’s overalls had a few small holes right below the collar. Instead of stitching up the holes, I decided to cover over the damaged area with a square appliqué patch embroidered with the Asanoha pattern. The name of this Sashiko pattern means hemp leaf and comes from its resemblance to that leaf. Because hemp is durable and grows fast, this design is used in Japan to represent the healthy growth of children and the protection from evil spirits.
I prepared a free template of an Asanoha design for you to download if you wish to replicate the appliqué patch that I made. The finished appliqué patch is approximately 9 cm by 9 cm (3 1/2″x 3 1/2″). You can scale the pattern a bit while printing to create a patch that matches your repair. Also, If you want to cover a bigger area with multiple Asanoha patterns, here is a site that explains how to do so.
What you will need to make a Sashiko applique patch:
- Muumade’s free downloadable template (link below in step 1);
- Thick cotton fabric (I used a scrap piece of jean fabric) to make the patch;
- Sashiko thread or cotton embroidery floss (all 6 strands together), in a contrasting color to the patch;
- Needle with a pointy tip and an eye big enough for the thread;
- Thimble;
- Tracing chalk, pencil or pen, OR a sheet of dressmaker’s carbon paper and a tracing wheel, to trace the pattern onto the patch (Here is a great site that compares a variety of tracing tools!);
- Ruler (for drawing straight lines);
- Sewing pins;
- Scissors; and
- an Iron.
Let’s begin!

Step 1: Cut out the patch
Download Muumade’s Free Sashiko Appliqué Patch Template (US Letter size or A4 size) and print it.
Cut out the template, and use the square outline of the pattern to cut out an appliqué patch from your scrap.


Step 2: Trace the pattern onto the patch.
I recommend the following methods for tracing the pattern onto the patch:
- use a sheet of dressmaker’s carbon paper and a tracing wheel, as shown in the first image on the left, OR
- fold the paper template along each straight line of the pattern and trace along the folds with tracing chalk, a pen or pencil, as shown in the second image.
☝️Please note that the carbon paper & wheel option may not work well on certain types of fabric, such as the jean material that I used. I had to re-trace the lines with tracing chalk.

Step 3: Place the patch onto the damaged area and pin it in place.

Step 4: Prepare a needle with thread (if using embroidery floss, use all 6 strands together).
For the purpose of making this appliqué patch, I recommend that you make an end knot in the thread to make the sewing easier.
However, you may be interested to know that Sashiko stitches are usually made without end knots! Instead, the Overlay Stitch is used at the beginning and the end of the sewing. This technique leaves the reverse side of the fabric just as tidy and pretty as the front.

Step 5: To begin sewing, decide where you want to start and insert the needle there from the reverse side and push it through the appliqué patch. Make evenly spaced Running Stitches along the lines of the pattern. To give you an idea, I made approximately 4-mm (5/32″) long stitches with 3-mm (1/8″) gaps between them.
Every once in a while, stretch out the fabric to flatten the patch.

DIY Sashiko Applique Patch
Step 6: When done, iron the embroidered area.
Next, tuck in the four edges of the appliqué patch and iron them to make neat creases. As shown in the second image on the left, trim off the four corners of the patch so that the folded edges do not overlap each other at the corners.
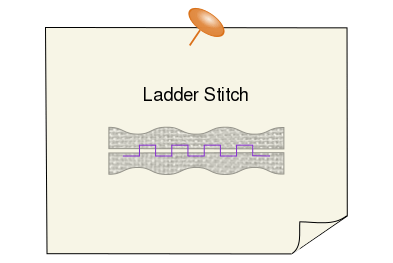

Step 7: Using the Ladder Stitch, sew the appliqué patch’s four edges onto the garment or bag.
When finished, you have not only repaired and reinforced your garment or bag, but you have also transformed it into a one-of-a-kind item with an elaborate Sashiko design!
Hurray for DIY mending!
Here are some other related posts that you may find interesting:


Discover more from Muumade
Subscribe to get the latest posts sent to your email.